Overview
This article walks through how to add Time Clock & Attendance to your account when you are already using When I Work Scheduling.
If you are new to When I Work and have not set up Scheduling, See Setting Up Scheduling and Time Clock & Attendance for Your Workplace.
Add Time Clock & Attendance to Scheduling
Add Time Clock & Attendance to take your employee management experience to the next level.
Activate Time Clock & Attendance
- Click Attendance on the navigation bar.

- Follow the Attendance Setup steps. The settings you configure can be changed at any time in the Attendance Settings.
Configure attendance settings
Hover over , then select Attendance Settings. Customize attendance settings to meet the needs of your business.
Time Clocks
Decide which time clock methods will meet the needs of your workplace. When I Work offers three different methods for clocking in and out. You can allow users to clock in using any or all of the following options:
- Clock in with Time Clock Terminal: A time clock terminal is a dedicated computer, tablet, or smartphone located at your workplace.
NOTE: The time clock terminal option is always enabled. Management can set up and lock a time clock terminal at any time. - Clock in with Mobile App: User’s iOS devices and Android devices (with the When I Work app).
- Clock in with Personal Computer: User’s personal computers that are connected to your workplace network.
- Clock in with Photo Clock In: An iOS Time Clock Terminal can be used to take a photo of the user when clocking in and clocking out.
Prepare your schedules and job sites
Set up your schedules and job sites with addresses to make sure users are clocking in from the right location. For more information, check out Restricting Where Users Can Clock In.
Prepare your shifts
To allow your users to clock in, their shifts must be tagged with the correct schedule and job site.
Review future shifts
Use the Scheduler to confirm that future shifts are assigned to the correct schedule and job site.
If you have multiple schedules, review each schedule one at a time:
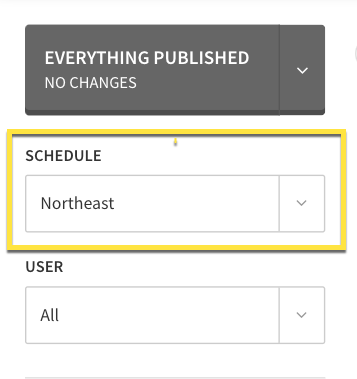
- On the left side of the page, select a schedule:

- Review all future shifts to make sure they are assigned to the correct schedule.
- If you use job sites, make sure shifts are assigned to the correct job sites. Use the Job Site filter to show shifts by job site.

Review shift templates
If you’ve created any shift templates, review them to make sure they are assigned to the correct schedule:
Hover over , then select Shift Templates.
- Review the list of shift templates to verify that the Schedule column is correct.
- If a shift template is set to the wrong schedule, click the shift template to set the correct schedule.
Instruct your users to start clocking in and out
Now that your clock in methods are defined, tell your users how they should clock in to their shifts. We recommend sending a WorkChat message to announce time clock procedures to your users.
Reference our articles on clocking in and out:
- Time clock terminal instructions
- Personal computer instructions
- Mobile instructions: iOS | Android
Next steps
- Review and edit timesheets from your computer, iOS device, or Android device.
- Set up payroll integrations.
- Close and export payroll.
- Check out Web App Navigation Reference for managers to help find features and settings within the account.
