Overview
Schedules allow you to group users together when you’re scheduling shifts. A schedule might represent a physical place of business, a department, a geographical region, or a group of users you want to schedule independently within When I Work.
You can also create and manage schedules from your iOS device or Android device.
Considerations
- You must have manager or admin level access to create and manage schedules.
- Deleting a schedule removes all shifts, shift templates, and job sites associated with the schedule. We recommend exporting shifts before deleting a schedule.
- Deleting a schedule cannot be undone.
Create a schedule
Hover over , then select Schedules.

- Click Add.
- Add a Name for the schedule.
- Configure the remaining schedule settings as necessary:

- To add a guideline for the maximum scheduled hours at this schedule per week, enter the number of hours in Max Hours / Week.
This value is intended for comparison purposes–When I Work doesn’t prevent you from scheduling more hours. - Enter the schedule’s Address or Custom Coordinates. If you are using Time Clock & Attendance, your Attendance Settings may require an address to be entered for time clock in verification. Once entered, make sure the map visualization displays the correct location.
- If you’re using Time Clock & Attendance and you want to allow users to clock in from their computers, set the IP Address. See our article on clocking in from a personal computer for more information.
- To add a guideline for the maximum scheduled hours at this schedule per week, enter the number of hours in Max Hours / Week.
- Click Add.
Assign users to schedules
Once you have created all of your schedules, the next step is to assign your users to their appropriate schedules.
Hover over , then select Users.

- Click that corresponds with a user to edit their profile.
- Click Assignments on the left side of Edit User screen.
- Use the Schedules menu to assign the user to schedules.

- Click Save User when finished.
If you want to tag multiple users to schedules at once, check out Assigning Users to Multiple Positions and Schedules.
Switch between schedules in the Scheduler
When you’re using the Scheduler, switch between schedules using the Viewing section under the date(s) at the top of the schedule.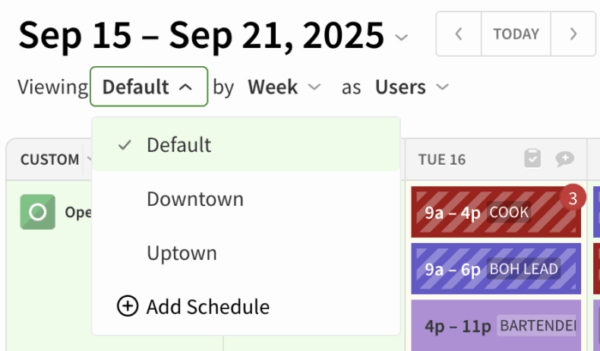
Delete a schedule
Deleting a schedule removes its past shifts, future shifts, shift templates, and job sites.
Hover over , then select Schedules.
- Click that corresponds with the schedule that you want to delete.
 A warning prompt appears.
 - Click Delete to confirm.
Search schedules
Use the left sidebar to search for specific schedules.
Hover over , then select Schedules.
- Click the search bar.
- Type the name of the schedule you want to find. The list is filtered to your search criteria automatically.
