Overview
When users request time off, use the When I Work web or mobile app to process their requests!
Considerations
- You must have supervisor, manager, or admin access privileges to process employee requests. If you’re a supervisor, you can only process requests for employees that belong to your schedules.
- Time off requests do not require approval if Require Approval for Employees and Require Approval for Supervisors is turned off in the General Settings.
- If you submit a time off request on an employee’s behalf, the request is automatically approved.
- All requests have a status. Learn more about the different Time Off Request Statuses.
How do I know when requests need my attention?
When a request needs your attention:
- We’ll send you an email and/or a mobile alert based on your alert preferences.
- The Notification Bell in the top-left corner of the When I Work web app shows a count badge. Click Notification Bell for more information.

- The iOS Notification Center will also have a badge to let you know to address requests.
Processing Submitted Requests
Computer
From the Time Off Requests page
Hover over , then select Time Off Requests.
- Find the time off request.
- Click Requests I Can Approve or All Requests.

- Requests I Can Approve: Requests that are Pending Approval that you can act on, excluding your personal requests.
NOTE: This tab is not present if approval is not required in the General Settings. - All Requests: Your personal requests and requests from others all in one place.
- Requests I Can Approve: Requests that are Pending Approval that you can act on, excluding your personal requests.
- Search for a request or filter requests by Date Range, Status, Type and Schedule in the left sidebar.

- Click Requests I Can Approve or All Requests.
- Click the Time Off request that you want to process.
- (Optional) To send a message to the user, type a message under Conversation/Activity, then click Post.

- Click Approve or Deny.
The user is automatically notified.
From the Scheduler
Click Scheduler.
- Click the pending request.

- Act on the request:
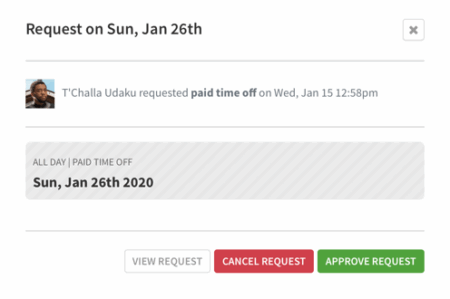
- Click Approve Request to approve.
- Click Cancel Request to deny the request.
- If you want to converse with the user about the request or view total time off balances, click View Request.
The user is automatically notified.
Android
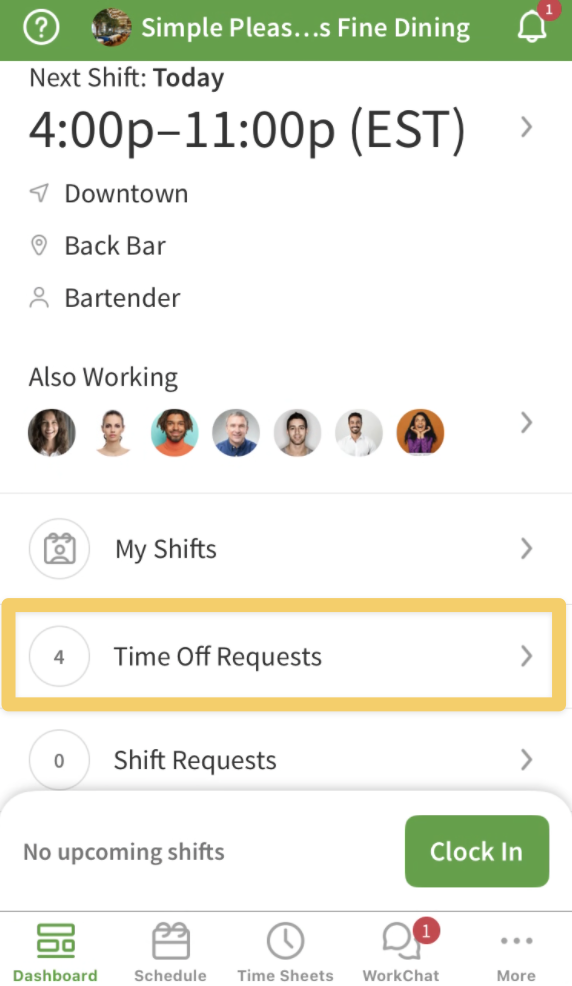
- From the When I Work Scheduling app, tap the Time Off Requests dashboard card.

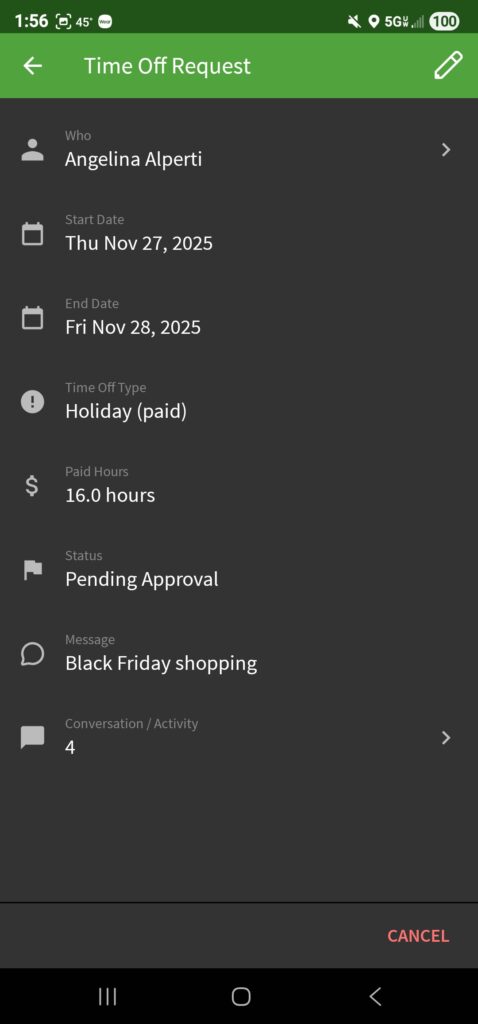
- Tap the time off request that you want to process.
- Requests that require your approval are automatically moved to the top of the list.
- Requests with a Pending Approval tag need action from a supervisor, manager, or admin.

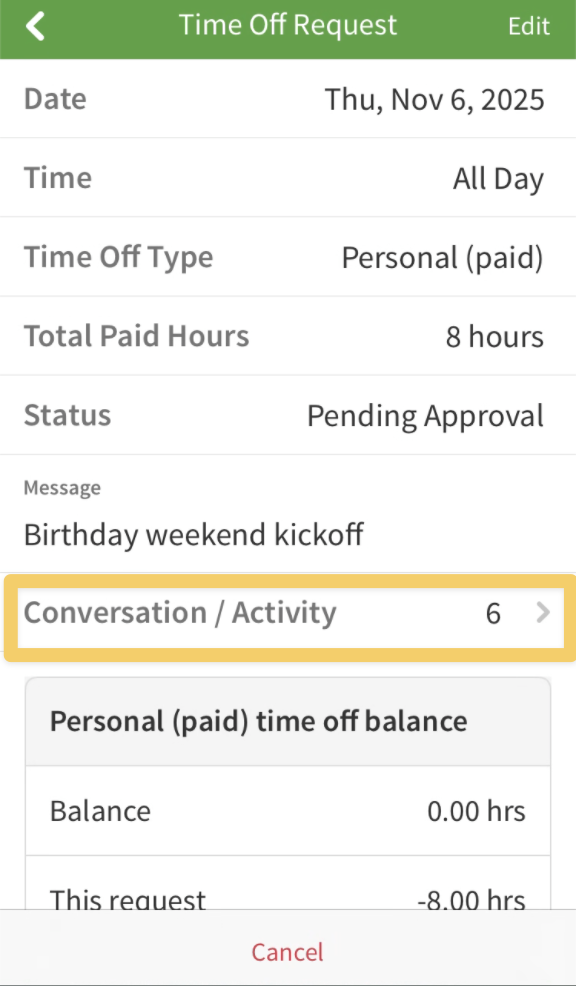
- The next page allows you to view the details of the request.
 a. Tap next to Conversation / Activity to discuss the request with the user.
b. To approve the request, tap Approve.
c. To deny the request, tap Deny.
iOS device
- From the When I Work Staff Scheduling app, tap the Time Off Requests dashboard card.
- Alternatively, you can access the iOS Notification Center and select the request from there
- Tap the Time-Off request you want to process.

- Requests that require your approval are automatically moved to the top of the list.
- Requests with a Pending Approval tag need action from a supervisor, manager, or admin.
- Approve or deny the request.
- To approve the time off request, tap Approve. The user is automatically notified.
- To deny the time off request, tap Deny. The user is automatically notified.
Time off request statuses
Each request has a status that lets you know its state and who needs to act on it.
| Status | Pending Approval |
| Description | The request is waiting for approval from management.1 |
| Status | Approved |
| Description | The request has been approved by management. |
| Status | Canceled |
| Description | The manager or the user that created the request has canceled the request. |
| Status | Expired |
| Description | The specific day regarding the request has passed; no one approved or denied it in time. |
| Status | Denied |
| Description | The request was denied by management. |
| Status | Description |
| Pending Approval | The request is waiting for approval from management.1 |
| Approved | The request has been approved by management. |
| Canceled | The manager or the user that created the request has canceled the request. |
| Expired | The specific day regarding the request has passed; no one approved or denied it in time. |
| Denied | The request was denied by management. |
1 This status only appears when Require Approval for Employees and/or Require Approval for Supervisors is enabled for time off requests.
Submitting Requests for Users
Submitting time off on behalf of users with employee-level access allows you to create requests for past dates that users can’t submit themselves. You can also submit time off on their behalf if you’ve disabled employees’ ability to submit their own time off requests in the General Settings.
Computer
Hover over , then select Request Time Off.
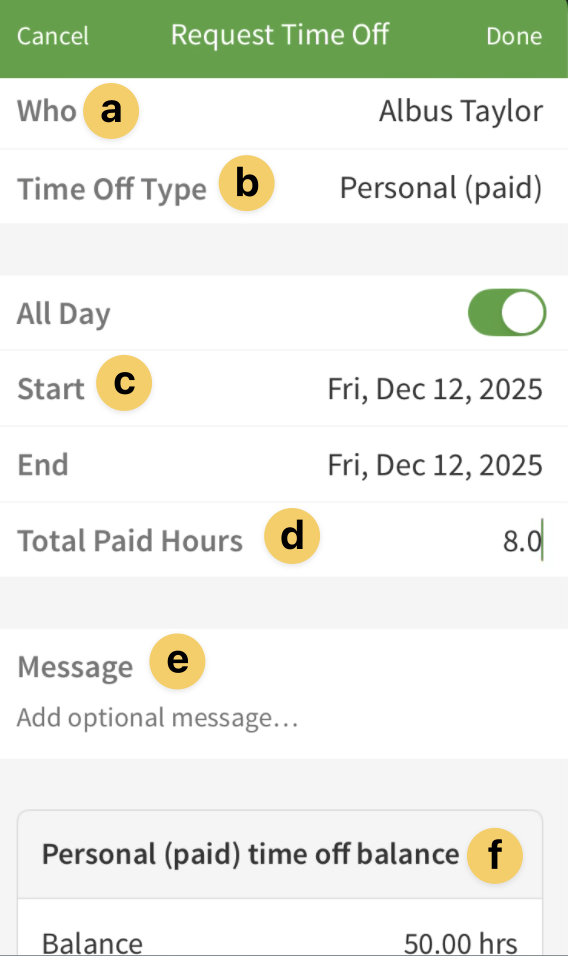
- Set up the time off request:

a. Set the Who you’re submitting time off for. You can enter multiple user names or select All/Everyone to submit the same request for multiple users at once.
b. Select the Time-Off Type.
c. Set the date and time for your time off request.
- If you are submitting an All Day request, check All Day then click to set the Start Date and End Date and enter the number of Paid Hours.
- If you’re submitting a Partial Day request, uncheck All Day then click to set the Start Date, then set the Time.
d. If this is for a paid time off type, enter the number of hours the user should get paid for.
e. Include an optional message if needed.
f. Check the current PTO balance a user has when using a PTO Accrual Policy.
- Note: Balances will not display when submitting time off for multiple users at the same time.
Android
- From the Android app dashboard, tap on Time Off Requests.

- Tap the in the upper right corner.

- Fill in the details:
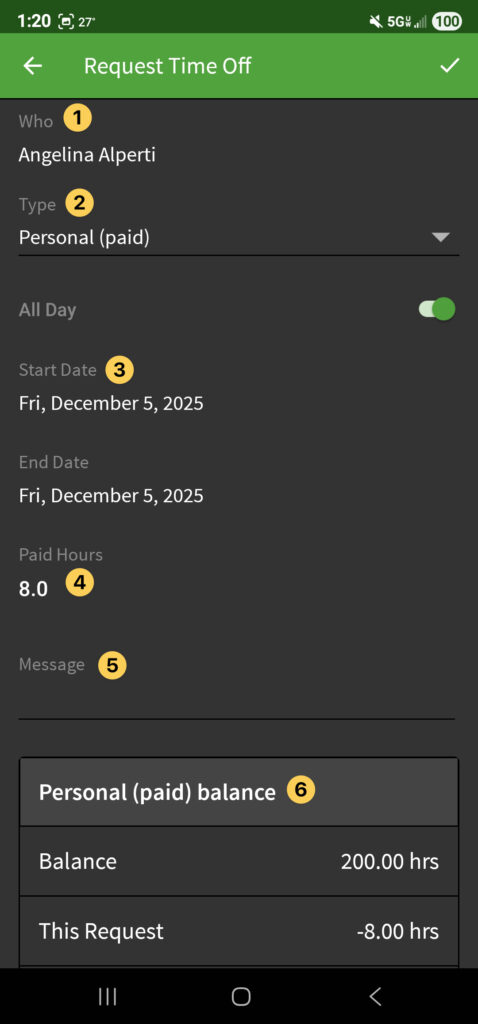
- Tap Who to open a list of all users in the account. Tap the users’ name you need and then tap the in the upper right corner to select them.

- Select the Type of time off being entered.
- Set the date and time for your time off request.
- If you are submitting an All Day request, check All Day then click to set the Start Date and End Date and enter the number of Paid Hours.
- If you’re submitting a Partial Day request, uncheck All Day then click to set the Start Date, then set the Time.
- If this is for paid time off, enter the number of hours the user should get paid for.
- Enter an optional message.
- Check the current PTO balance a user has when using a PTO Accrual Policy.
- Tap Who to open a list of all users in the account. Tap the users’ name you need and then tap the in the upper right corner to select them.
iOS Device
- From the iOS app dashboard, tap Time Off Requests.

- Tap the in the upper right corner of the app.

- Fill in the details:
- Tap Who to open a list of all users in the account. Tap the users’ name you need and then tap the in the upper right corner to select them
- Select the Type of time off being entered.
- Set the date and time for your time off request.
- If you are submitting an All Day request, check All Day then click to set the Start Date and End Date and enter the number of Paid Hours.
- If you’re submitting a Partial Day request, uncheck All Day then click to set the Start Date, then set the Time.
- If this is for paid time off, enter the number of hours the user should get paid for.
- Enter an optional message.
- Check the current PTO balance a user has when using a PTO Accrual Policy.
Editing Requests
Note: A request can only be edited if it is in the Pending status. If it has already been approved, it will need to be canceled and resubmitted with changes.
Computer
- Navigate to the Time Off Requests tab.
- Click on the request you want to edit.
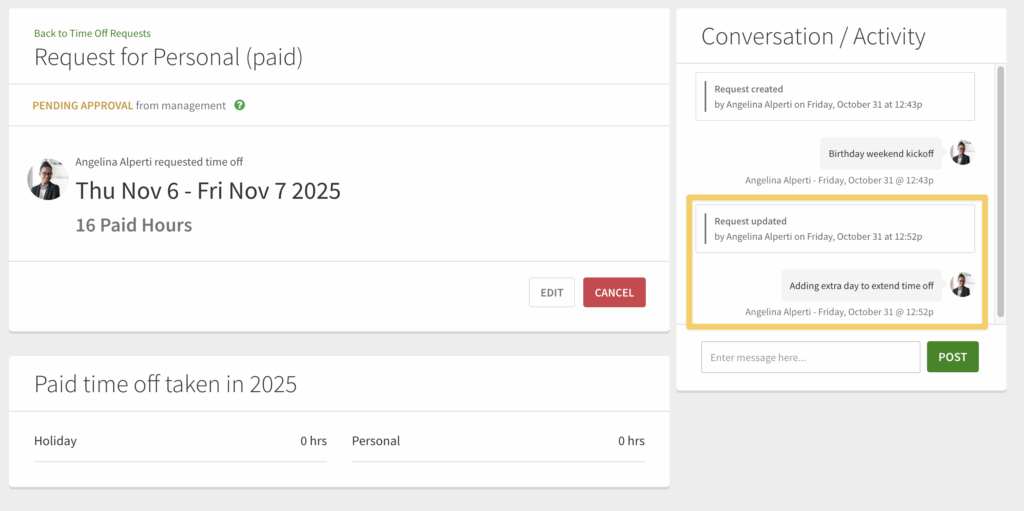
- In the details page, click Edit.
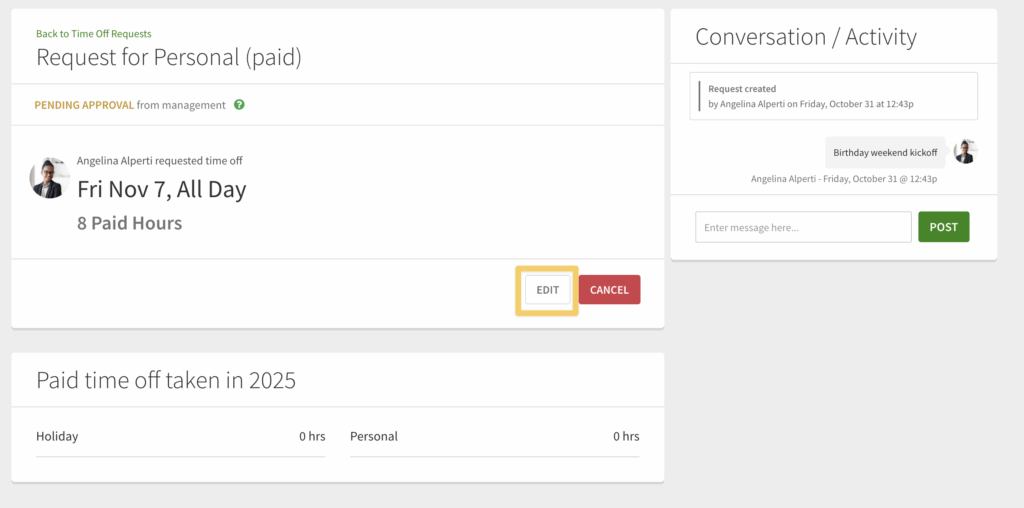
- In the open dialogue window, change the necessary details, add a note for the change, and then click Save.

- Change logs will appear in the Conversation/Activity window in the request details page.
From an Android
- From the When I Work Scheduling app tap the Time Off Requests button.
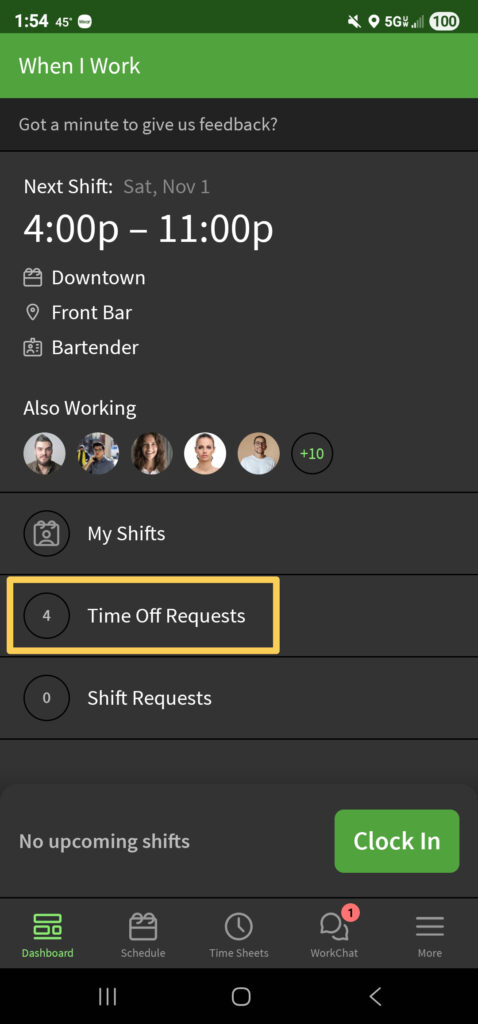
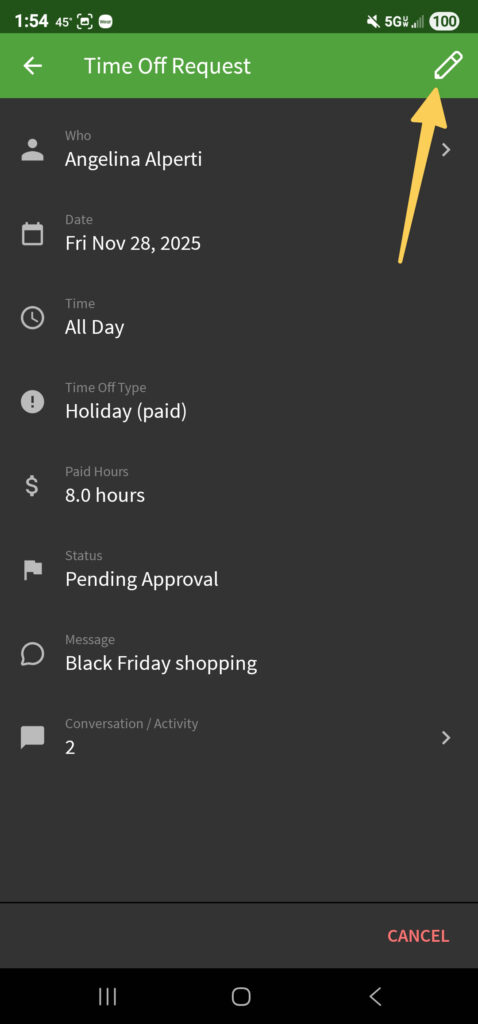
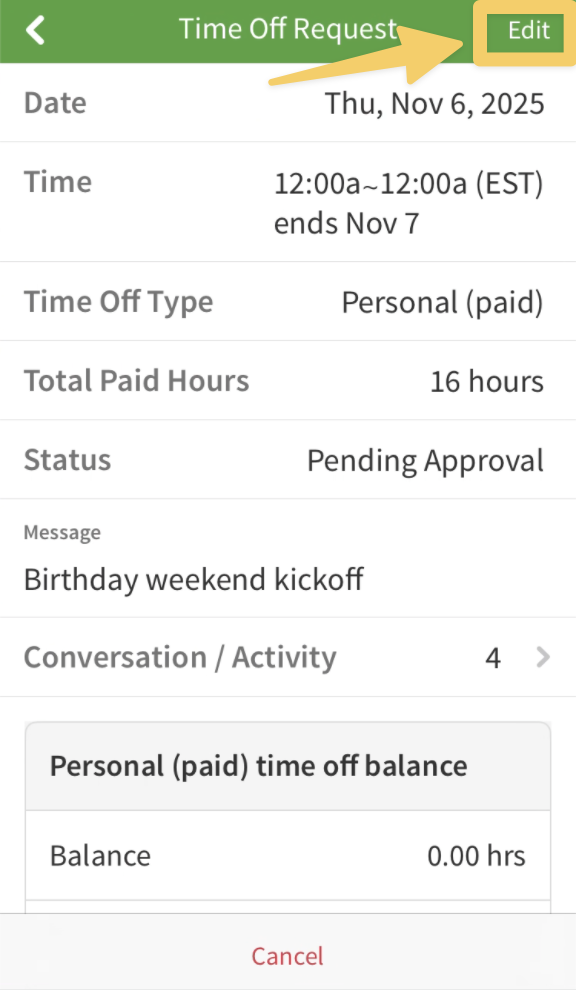
- Tap on the request you want to edit to open the details.
- In the details page, tap on the in the upper right corner.
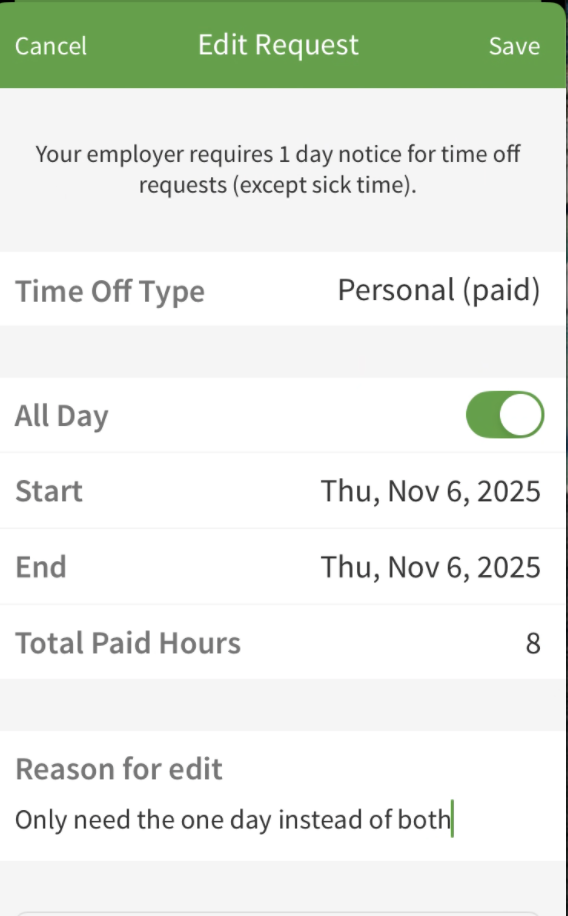
- Change the details as needed, add a reason for the edit, and then tap in the top right corner to save the changes.
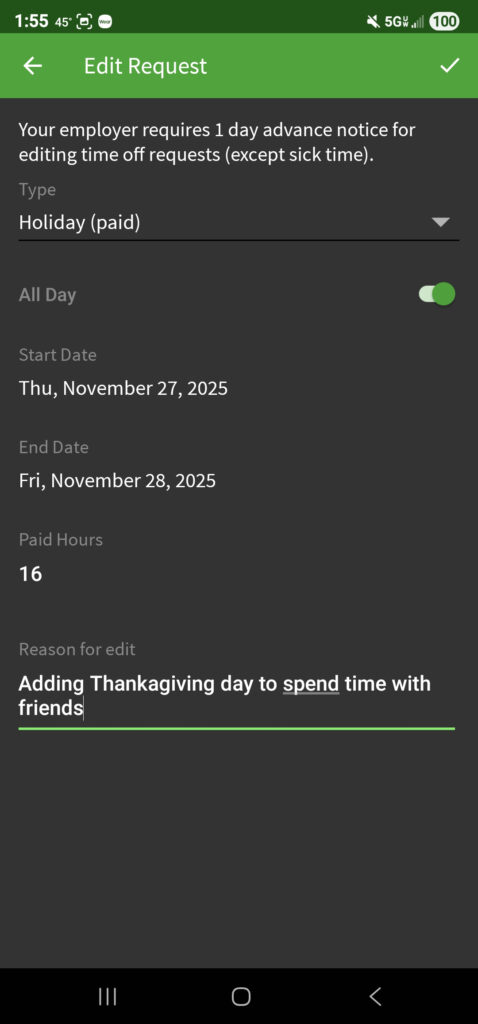
- Confirm the changes back on the details page of the request.
- Tapping the Conversation/Activity button will open a new window with the request edit history and notes.

- Tapping the Conversation/Activity button will open a new window with the request edit history and notes.
From an iOS device
- From the When I Work Staff Scheduling app tap Time Off Requests.
- Tap on the request you want to edit to open the details.
- In the details page, tap Edit in the upper right corner.
- Change the details as needed, add a reason for the edit, and then tap Save in the top right corner to save the changes.
- Confirm the change back in the details page. Tap on Conversation/Activity to see the change history.
Viewing Paid Time Off Totals
Paid time off totals allow you to see how much paid time off you’ve taken from January 1st to the current date. The paid time off total includes PTO, sick, and holiday time off.
- Paid time off totals are only accessible through the When I Work web app.
- Paid time off totals include past and present approved paid time off. Unpaid time off is not included.
- If you have supervisor, manager, or admin access privileges you can view your user’s paid time off totals in addition to your own. If you’re an employee you can only view your own paid time off total.
- The Export button at the top of the page allows you to export time off totals for a user or everyone.
Steps
Hover over , then select Time Off Requests.
- Find a time off request you want to view the totals for, then click on the time off request.
You can also search for a time off request using the search bar at the top of the page. - The year-to-date total displays PTO, Sick, and Holiday hours under [user]’s Paid Time Off Totals for [year].

Exporting Time Off Requests
Exporting time off requests from your When I Work account allows you to download a spreadsheet containing your user’s unpaid, paid, sick or holiday requests. Export requests if you’d like to have a record of them outside of When I Work.
Considerations
- The export contains the dates of the request, the date the request was created, paid hours (if applicable), the status of the request, and the approval details.
- The export allows up to 5,000 time off entries per export.
- Based on the date the request was created, When I Work keeps time off requests for two years.
Steps
Hover over , then select Time Off Requests.
- In the upper-right corner of the screen, click Export.
- Configure your export:
- Set the Start Date and End Date.
- Select the Users whose requests you’d like to export.

- Click Export. The file downloads to your computer.