Overview
If you use When I Work Time Clock & Attendance, you can easily export your payroll information to a CSV file and upload it to Paychex.
Considerations
Your workplace must use Time Clock & Attendance to set up payroll integrations.
- You must have admin or manager (with “can manage timesheets and pay periods” enabled) level access to set up the Paychex integration and export payroll data.
- You must have a Paychex Flex plan to use the integration.
- Contractors are not supported.
Before you begin
- Your Paychex account requires the Paychex Standard Payroll Import (SPI) setting to be enabled in order to successfully import the When I Work payroll file. Reach out to your Paychex client support representative to enable this for you.
- Make sure you have the following information from your Paychex account:
- Client ID
- Worker ID for each user
- Pay components
- Labor assignments (optional)
Setting up the Paychex integration
Turn on the Paychex integration and add your Paychex information to configure your payroll exports.
Turn on the Paychex integration
Hover over , then select Integrations.
- Click See All Integrations.
- Under Paychex, click Learn More.
- In the upper-right corner of the screen, click Enable.

Add your company information
On the Company tab, add your Client ID, then click Save.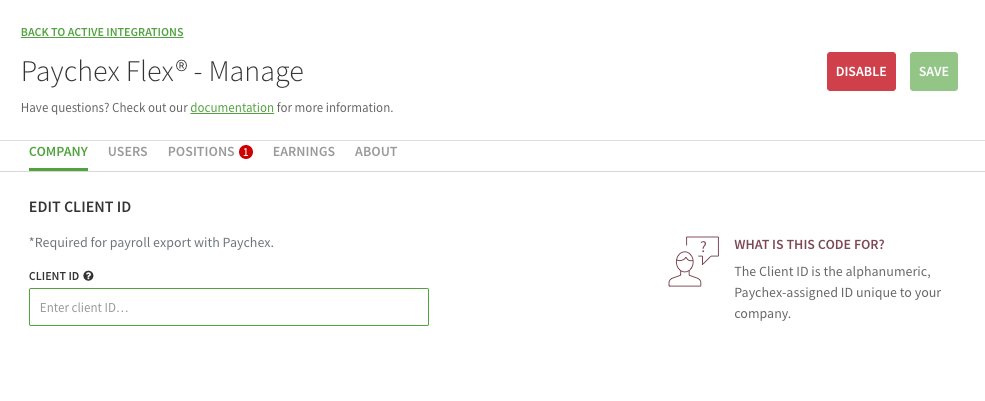
Add user’s worker IDs
On the Users tab, enter each user’s Paychex Worker ID. If you want to exclude a user from the payroll export, leave their ID blank.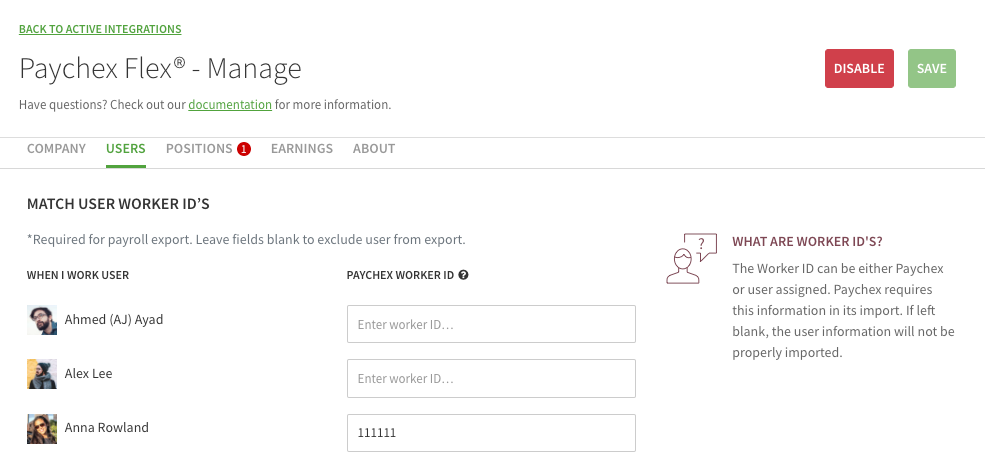
When you’re finished, click Save.
Add your labor assignments
If you use Paychex’s Labor Distribution product and want to include position information in the CSV export, go to the Positions tab and enter the Labor Assignment that corresponds with a position in When I Work.
NOTE: Adding labor assignments for your positions is optional. If you don’t use Labor Distribution, skip this step.
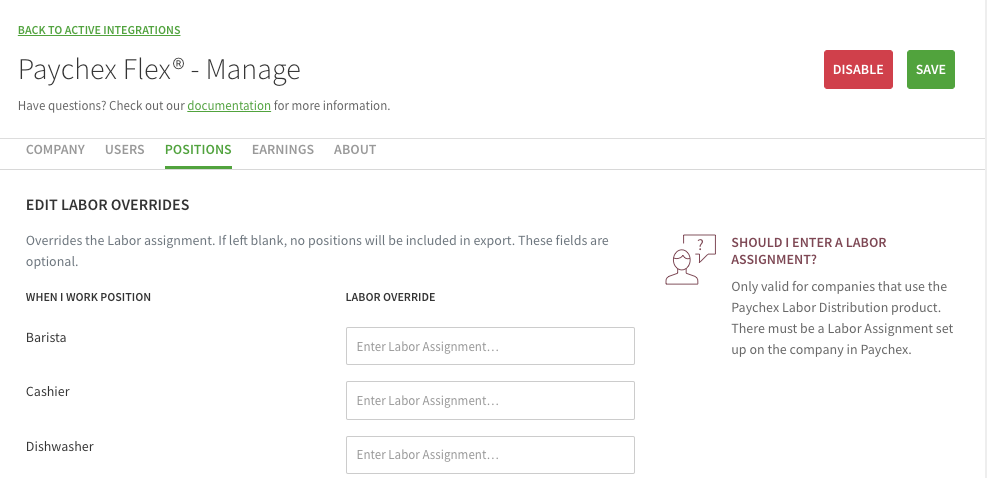
When you’re finished, click Save.
Add your pay components
On the Earnings tab, enter the Paychex Pay Component that corresponds with each type of pay in When I Work. If you don’t use a certain type of pay component in Paychex, leave the Paychex Pay Component field blank.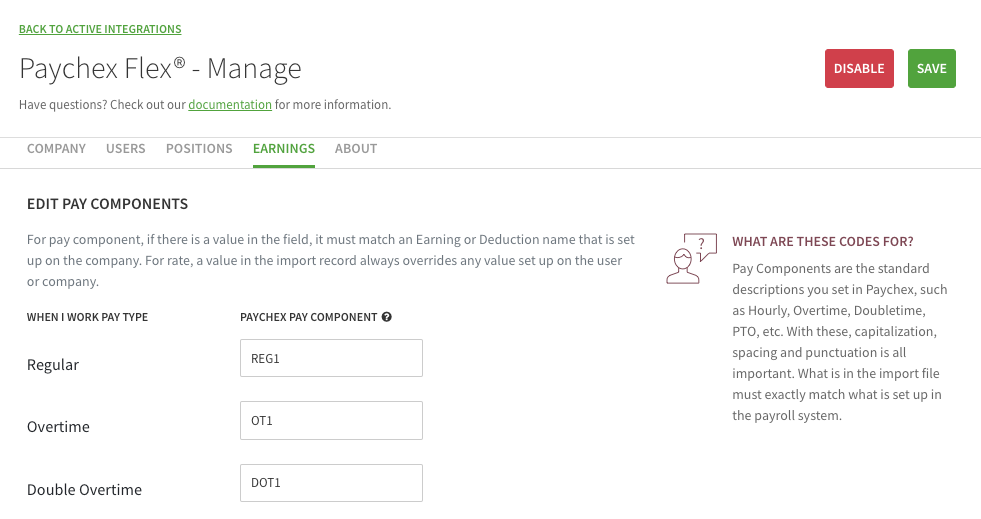
When you’re finished, click Save.
Sending pay period data to Paychex
- When a pay period has ended, close and export pay period hours.
- Click Export Paychex.

- Save the CSV file to your computer.
Do not make changes to the column headers in the CSV file. - Upload the CSV file to Paychex.