Overview
Get more insight into your budget using the forecast tools. Use forecast tools while scheduling to ensure you have the right coverage and are within your labor budget.
Use the forecast data import function to quickly enter forecast information across time.
Considerations
- By default, supervisors can view and edit projected sales and hours budgets but cannot view daily labor cost. To let a supervisor to see labor costs, allow the supervisor to view employee wages.
- Overtime wages are not calculated into the labor budget. Overtime wages must be calculated manually.
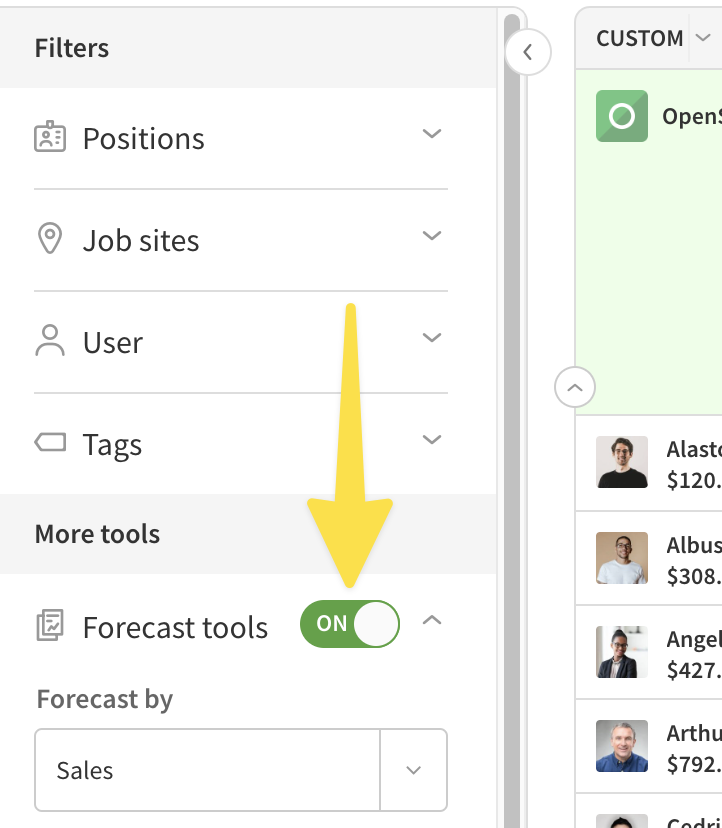
Turning on forecast tools
Click Scheduler.
- Switch on Forecast Tools on the left side of the scheduler under the More tools section. Alternatively, click the hour totals below a user’s name on the left side of the schedule.
Sales forecasting
View how much is being spent on labor costs as you schedule. Input projected sales to get a labor expenses to projected sales ratio. If you’re working in a past week, Sales Budget become Actual Sales.
- Click the Forecast By menu, then select ‘Sales’.

- For current and future weeks, enter your Sales Budget and Labor % Target. Your sales budget and labor costs calculate your Assigned Labor.

- Sales Budget: Your daily predicted revenue. The weekly total sales budget appears when entering your daily totals.
- Labor % Target: Your target percentage of labor/wages compared to your sales budget. Your weekly average appears based on the daily percentages that are entered.
- Assigned Labor: The actual percentage of labor/wages compared to your sales budget. The difference between the target percentage and assigned percentage displays in dollars.
Weekly projections
As you enter your sales figures into the forecast tool, your Weekly Projections are calculated.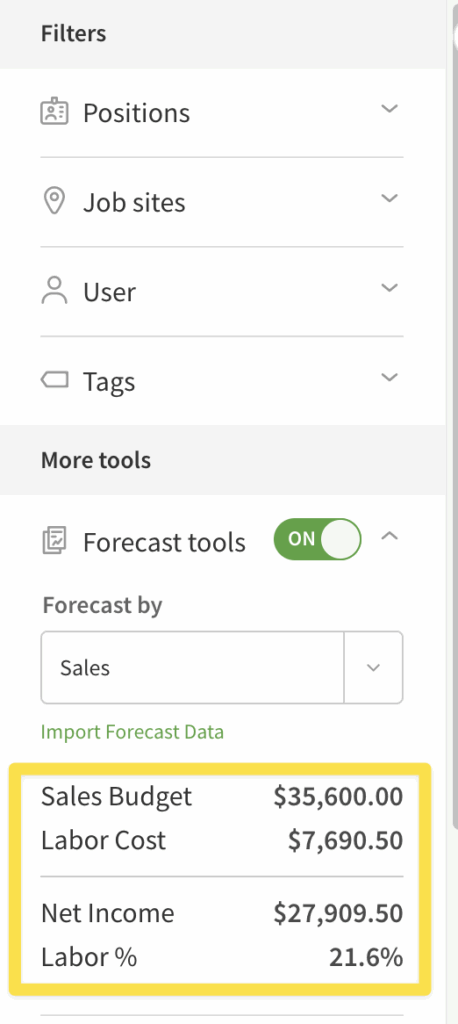
View labor costs for individual users
When forecast tools are turned on a user’s labor cost appears below their names.

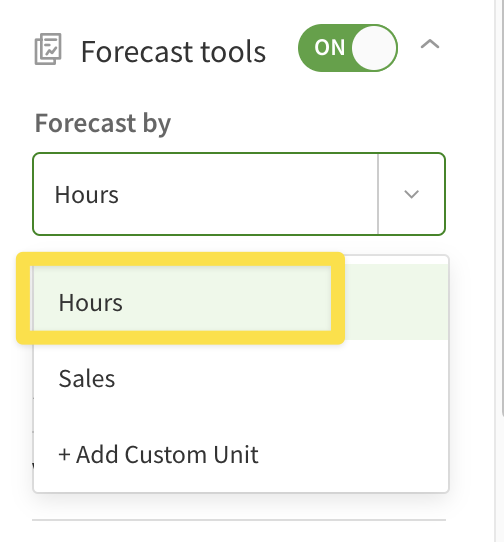
Forecast by hours
View whether or not you are over or under your labor budget based scheduled hours. If you’re working in a past week, Weekly Hours Budget becomes Actual Budget.
- Click the Forecast By menu, then select ‘Hours’.
- For current and future weeks, enter your Hours Budget.

- Hours Budget: The budgeted number of total scheduled hours per day. The weekly hours budget is calculated as daily hours budget is entered.
- Combined Hours: The actual total hours of the published and unpublished shifts in the scheduler. The difference between the daily hours budgeted and the actual scheduled hours displays.
- Hours Budget: The budgeted number of total scheduled hours per day. The weekly hours budget is calculated as daily hours budget is entered.
Weekly hours variance
As you enter your hours budget into the tool, your Hours Variance is calculated.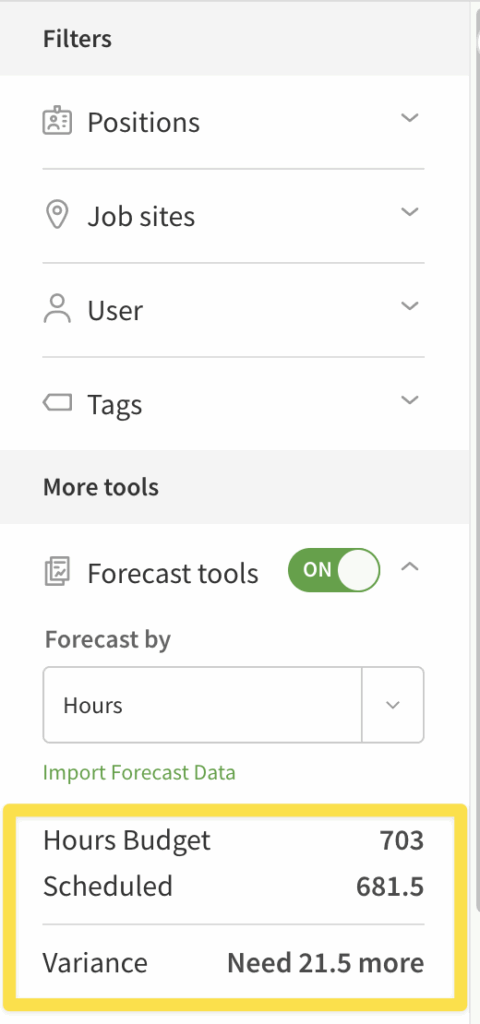
Forecast by custom units
Create a custom unit to forecast the shift or hours needs for your organization. Custom forecast units calculate the number of shifts or hours to target while scheduling.
Add custom units
- Click the Forecast By menu, then select ‘+ Add Custom Unit’.
 The custom unit configuration screen appears.
 - Enter a unit name.
- Choose how to track coverage:

- By number of shifts per position
- By number of hours per position
- By number of shifts per position
- Enter the units and shifts or hours to convert your unit to the desired number of shifts or hours by position.
 NOTE: When ‘by number of shifts per position’ is selected, rounding options for calculating coverage appears. Choose to round up, round to nearest, or round down. Hours will always be rounded to 2 decimal places.
 - (Optional) Click ‘+ Add Another Position’ to add additional positions for the set units.

- Click Save to save the custom unit.
Forecast by units
- Click the Forecast By menu, then select your custom unit.
- For current and future weeks, enter your Projected Units.
- If forecasting by number of shifts per position:

- Projected Units: Your projected units entered calculates how many shifts are required per position.
- Position Name: The position row displays scheduled shifts over the total shifts per projected units.
- If forecasting by number of hours per position:

- Projected Units: Your projected units entered calculates how many hours are required per position.
- Position Name: The position row displays scheduled hours over the total hours per projected units.
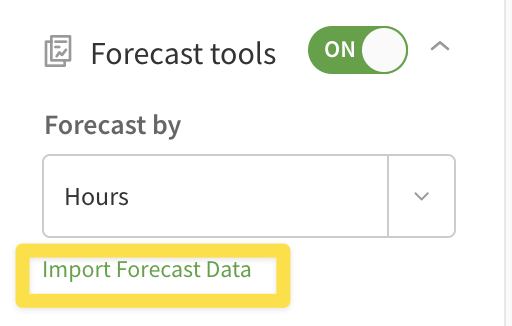
Import forecast data
Import your sales and hours data into the forecast tool.
- Click Import Forecast Data.
- Click Download our Template. Enter dates, sales and hours information into the template.
NOTE: Values need to be entered as integers and can include decimals. Sales values can include dollar signs and commas. - Click Upload File. Select and upload your spreadsheet file.
- Match the spreadsheet fields then click Continue.
 Resolve any errors. An error message displays in the following cases:
- File size exceeds 8 MB
- File is not CSV, XLS and XLSX
- Uploading more than one file at a time
If needed, click Upload New File to choose a new file.

- Click Import.