Overview
If you notice a discrepancy in a user’s timesheet, you can make the necessary corrections. You can also add time off and unpaid breaks.
If you’re an employee, you can edit your own timesheet if your employer has chosen to allow it.
Considerations
- For information about how to read time entries, see our article on reviewing timesheets.
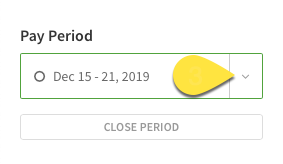
- Pay periods can be open to allow changes or closed to ready the pay period data for export.
- Open circle indicates the pay period is open; supervisors, managers, and the admin can make changes. Employees can make changes if allowed by the Attendance Settings.
- Check circle indicates the pay period is closed; no further changes can be made unless the pay period is re-opened by the admin or a manager with access to manage timesheets and pay periods.
Open the timesheet
Hover over Attendance, then select Timesheets.

- In the Pay Periods list, select the pay period that you want to view.

- Click the user’s name under Timesheets on the left or the summary table on the right.
The user’s timesheet appears.
Edit the timesheet
Now that you’re viewing the right timesheet, you can make corrections, add new entries, add time off, and even delete entries.
Add a time entry based on a scheduled shift
If the user forgot to clock in and out for a shift, you can use the shift information to automatically create the timesheet entry.
- In the upper-right corner of the screen, click Show Shifts.
 Scheduled shifts appear at the bottom of the day rows.
 - Find the shift that needs a timesheet entry.
- In the Details column, click at the right side of the shift.

Add or edit a clock in or out time
Edit the clock in or out time if you need to correct an error, or if the user forgot to clock in or out.
- Click the cell that corresponds to the in or out time.
- Add or edit the time. Use “a” for A.M. and “p” for P.M.
For example, enter 8:45a for 8:45 A.M. - Press Enter or Return.
Add or edit time entry details
When a user clocks in for a shift, the details for the timesheet entry are filled in based on the shift. However, if the shift didn’t have the information or the user wasn’t scheduled to work, you may need to add details manually.
The timesheet entry details contain optional information, such as:
- Schedule
- Lunch Break
- Position
- Job site
- Notes
To change any of this information, hover your pointer over the details cell, then click an item to make changes.
Add time off
- In the Day column, click Plus button, then select the type of time off.
- If you selected Paid (PTO), Sick, or Holiday, enter the number of paid hours in the Total column.
Delete a timesheet entry
To delete a timesheet entry, clear the Out then the In times.
