Overview
Availability preferences let you know when a user prefers to work. You might need to edit a user’s availability yourself if the settings of the account have this disabled for employee users.
Considerations
- You must have Supervisor, Manager, or Admin access privileges to set availability preferences on behalf of another user.
- You can add, edit, or delete availability preferences that take place in the future but not preferences that take place in the past or on the current day.
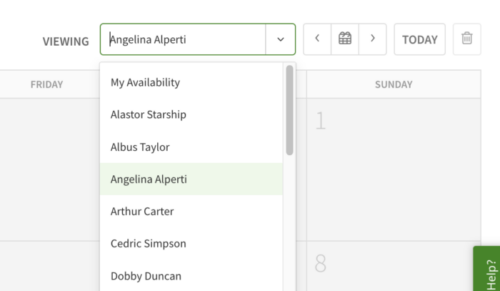
Computer
- If you need to edit another user’s availability, use the Viewing menu in the upper-right corner of the screen to switch between their preferences.
Adding an availability preference
Hover over , then select Users.
- Click that corresponds with the user whose availability you’d like to edit.

- Click on +Add Preference and fill in details.
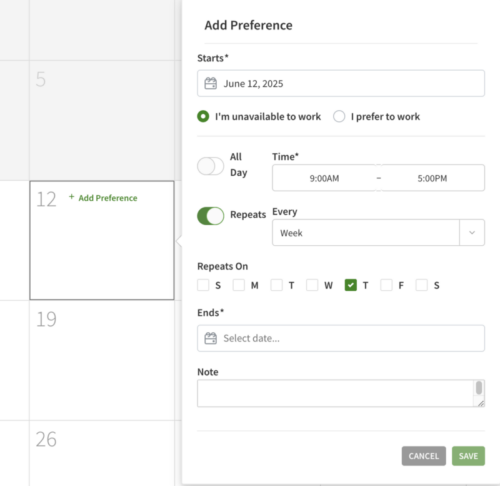
- Click Save.
Editing and Deleting a preference
Hover over , then select Users.
- Click that corresponds with the user whose availability you’d like to edit.
- On the Calendar, hover over a preference and click on the Edit button.
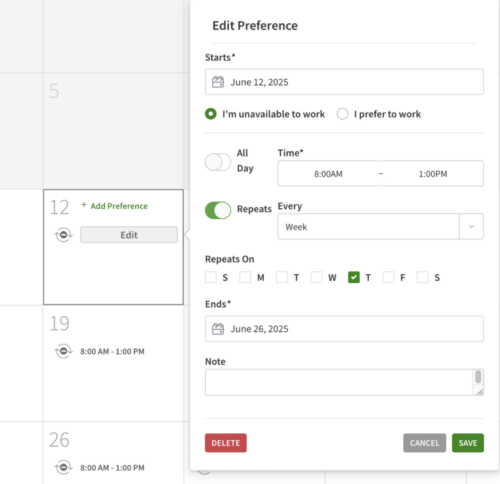
- If editing, make the necessary changes and click Save.
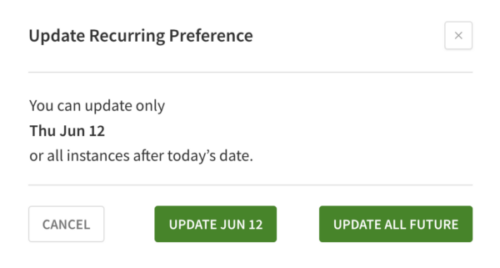
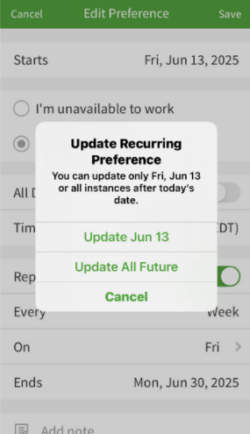
- If the preference repeats, you’re prompted to confirm your choice:
- To make the change for the one day, click Update “date”.
- To make the change for all repeats, click Update All Future.
- If the preference repeats, you’re prompted to confirm your choice:
- If deleting, click the Delete button.
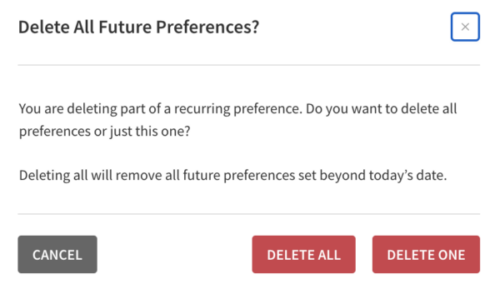
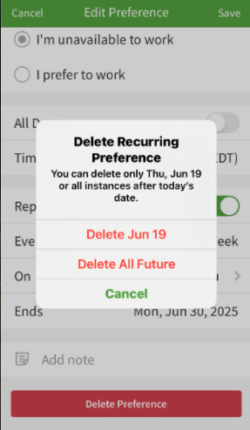
- If the preference repeats, your prompted to confirm your choice:
- To delete the preference for the one day, click Delete One.
- To delete all repeats, click Delete All.
- If the preference repeats, your prompted to confirm your choice:
Android
Adding an availability preference
- From the When I Work Scheduling app, tap More on the bottom-right corner of the screen.
- Tap Users.
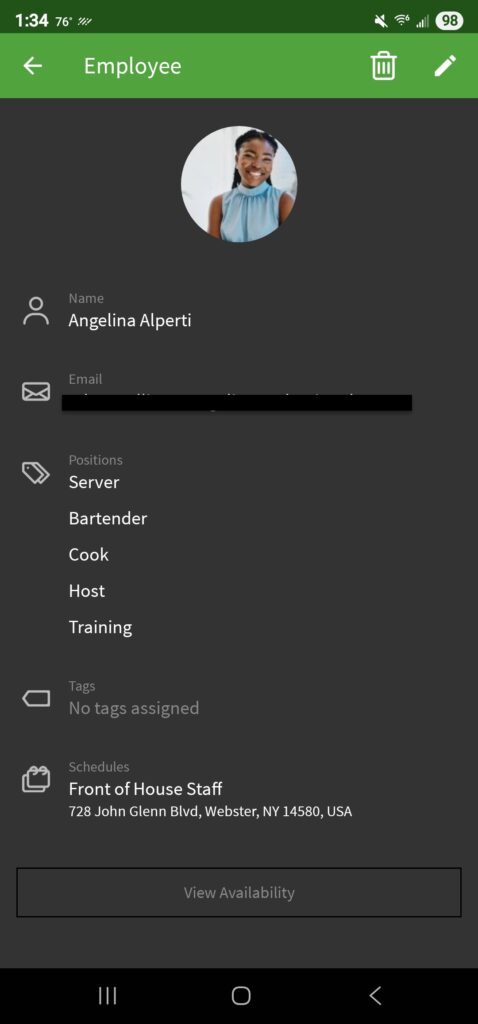
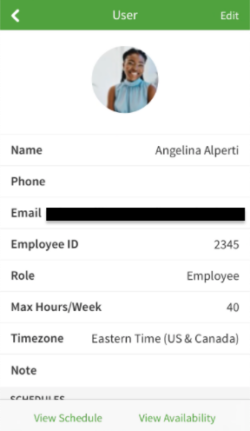
- Tap the employee for whom you want to edit availability preferences.
- At the bottom of the screen, tap View Availability.
- On the Calendar, swipe left/right to switch between months. Tap on to start creating a new preference.

- Add in the preference details and then tap in the top right to save.
Editing and Deleting a preference
- From the When I Work Scheduling app, tap More on the bottom-right corner of the screen.
- Tap Users.
- Tap the employee for whom you want to edit availability preferences.
- At the bottom of the screen, tap View Availability.
- To edit a preference, tap on it to open the details
- Make the changes necessary and then tap to save.
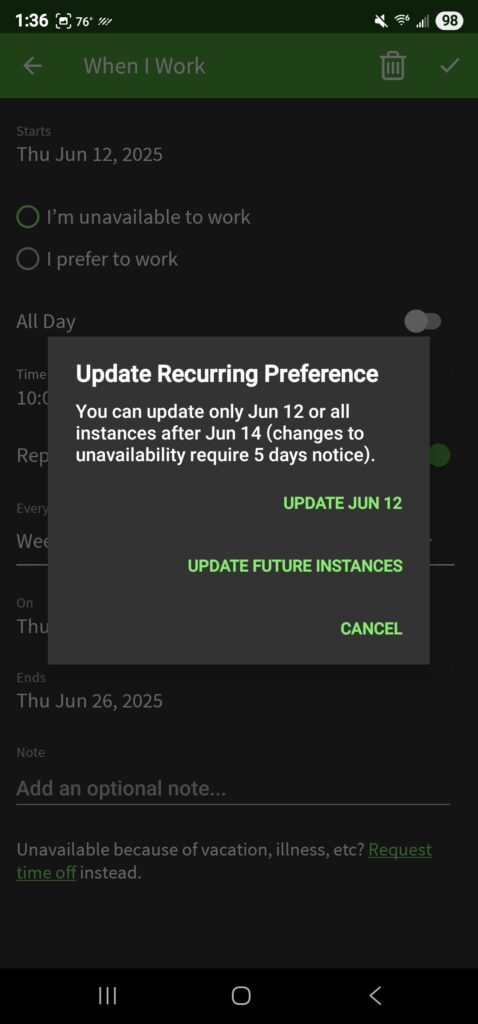
- If the preference repeats, you will be prompted to confirm your choice:
- To update the single instance, tap Update “date”.
- To update all instances, tap Update Future Instances.
- To delete, tap the in the upper right corner
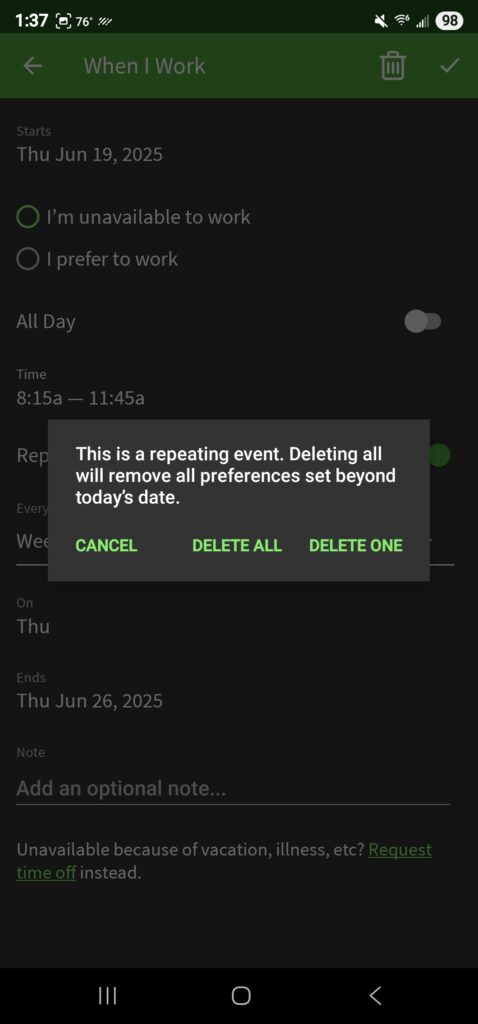
- If the preference being delete repeats, you will be prompted to confirm your choice:
- To delete the single instance, tap Delete One.
- To delete all preferences, tap Delete All.
- If the preference being delete repeats, you will be prompted to confirm your choice:
iOS
Adding a preference
- From the When I Work Staff Scheduling app, tap More icon More in the bottom-right corner of the screen.
- Tap Users.
- Tap the user for whom you want to edit availability preferences.
- At the bottom of the screen, tap View Availability.
- On the Calendar, use the left/right arrows to switch between months. Tap on to start creating a new preference.
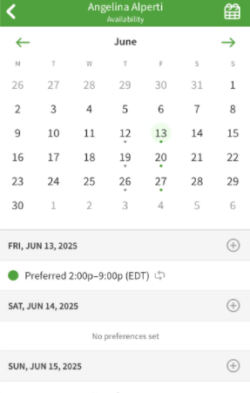
- Add in the preference details and then tap Save in the top right corner.
Editing and Deleting a preference
- From the When I Work Staff Scheduling app, tap More icon More in the bottom-right corner of the screen.
- Tap Users.
- Tap the user for whom you want to edit availability preferences.
- At the bottom of the screen, tap View Availability.
- To edit a preference, tap on it to open the details
- Make the changes necessary and then tap Save.
- If the preference repeats, you will be prompted to confirm your choice:
- To update the single instance, tap Update “date”.
- To update all instances, tap Update Future Instances.
- To delete, tap Delete Preference at the bottom of the app.
- If the preference being delete repeats, you will be prompted to confirm your choice:
- To delete the single instance, tap Delete “Date”.
- To delete all preferences, tap Delete All Future.
- If the preference being delete repeats, you will be prompted to confirm your choice: