Overview
Whether you prefer to schedule in user view, positions view, or coverage view, you can filter your schedule to quickly view coverage for particular positions or job sites. Instead of viewing your entire schedule, filtering helps you narrow your schedule down to the shifts you want to see.
Filters can be collapsed and you can scroll independently from the schedule.
User filters
By default, all users are shown on the Scheduler. You can filter down to a single user or OpenShifts by using the User drop down menu. Click the drop down menu then select the user you want to filter to.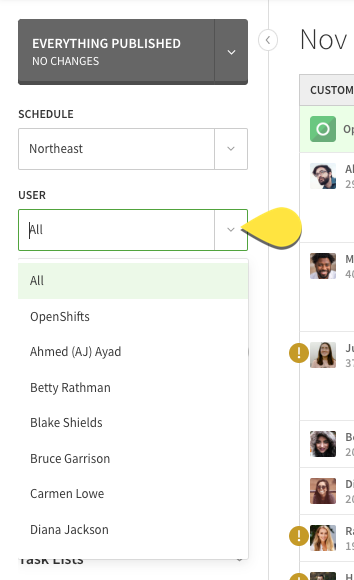
Showing or hiding filtered users
When you’re filtering the schedule by position or job site, users who don’t match the applied filters are hidden by default. If they have other shifts that don’t match the applied filters, the shifts appear greyed out on the schedule with a dashed line around the border of the shift.
To show users who are being filtered from the schedule, click the Hide-Show Filtered Employees button button in the top-left corner of the Scheduler.
Click Hide-Show Filtered Employees button again to hide filtered users.
Hiding unscheduled users
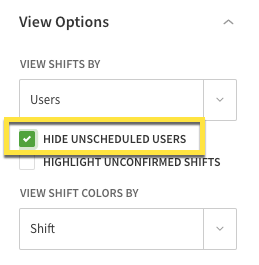
As you are building the schedule, you can hide users who aren’t yet scheduled for the particular day or week you’re viewing. To hide unscheduled users, check the Hide Unscheduled Users checkbox in the User view of the View Options menu to the left of the schedule.
Highlight unconfirmed shifts
If you want to view shifts that have yet to be confirmed by the user, check Highlight Unconfirmed Shifts checkbox in the User view of the View Options menu to the left of the schedule. Confirmed shifts appear greyed out on the schedule.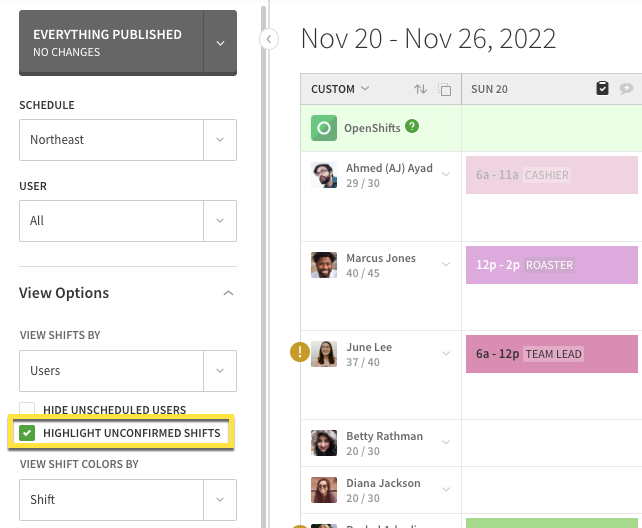
Position filters
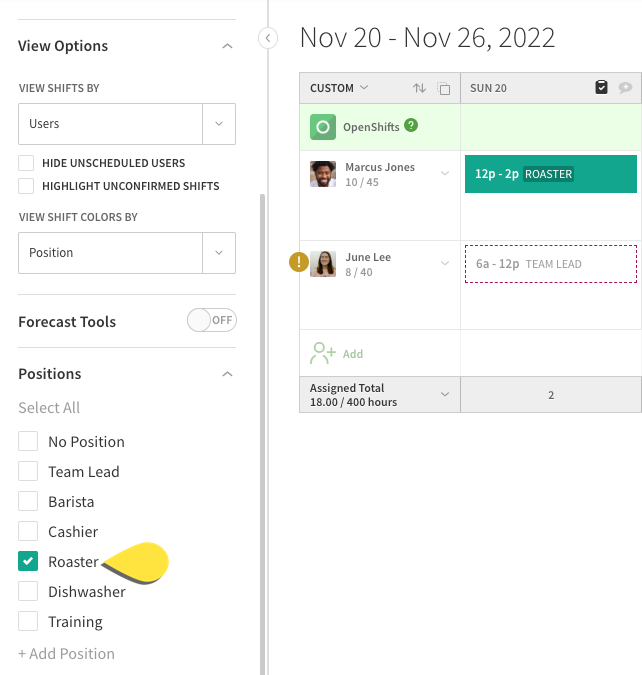
Select Position in the View Shifts By drop down menu under View Options to filter your schedule based on position. Shifts that don’t match your applied position filters appear greyed out with a white background and a dashed line around the border of the shift.

View shifts for a single position
If you want to view shifts for a single position, click Select None, then click the position name. Users tagged to the selected position or shifts assigned to the selected position are shown.
View shifts for multiple positions
If you don’t want to view shifts for a particular position, click the box to the left of the position name to filter it from the schedule.

Tags filters
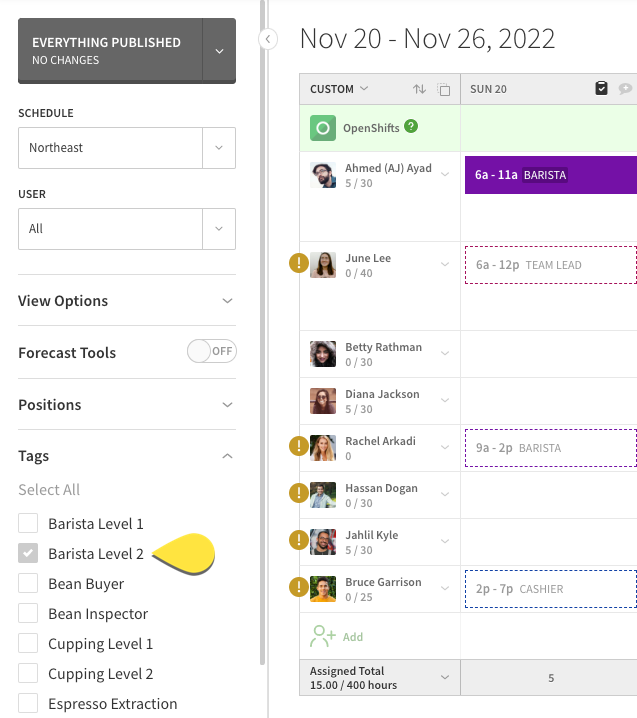
Use the Tags menu to the left of the schedule to filter your schedule by tags.
View Tags in user view
When you select tags in user view:
- Users with all the tags selected remain visible.
- Users not assigned to all tags selected, but with an assigned shift with all tags selected appear.
View Tags in position view
When you select tags in position view:
- Any shift matching selected tags is visible and fully opaque.
- Any shift not matching selected tags are not visible.
If you want to view shifts or users that are assigned a particular tag, click the tag. To view shifts or users for multiple tags, select each tag in the list you want to see.
Job site filters
Use the Job Sites menu to the left of the schedule to filter your schedule by job site. Shifts that don’t match your applied job site filters appear greyed out with a white background and a dashed line around the border of the shift. Shifts that are solid grey indicate the user is at the same job site but on a different schedule.
View shifts for a single job site
If you want to view shifts assigned to a particular job site, click Select None, then click the job site name. You can also just select the job site you would like to filter to.

View shifts for multiple job sites
If you don’t want to see shifts assigned to a particular job site, click the box to the left of the job site name to filter it from the schedule.

Hiding unscheduled positions
If you’re building your schedule using Positions view, you can hide positions that have not been scheduled for the particular day or week you are viewing. To hide unscheduled positions, check the Hide Unscheduled Positions checkbox in the Position view of the View Options menu to the left of the schedule.

Highlight OpenShifts
In Position view, you can view only the OpenShifts you have scheduled. To highlight only OpenShifts, check the Highlight OpenShifts checkbox in the Position view of the View Options menu to the left of the schedule.

Show shifts at other schedules
In Position view, you can view shifts from other schedules you have created. To show shifts from other schedules, check the Show Shifts at Other Schedules checkbox in the Position view of the View Options menu to the left of the schedule.

Resetting the filter
To reset filters applied to your schedule, click Select All in the top-left corner of the Positions or Job Sites menus.